Friday, June 27, 2014

4 great ways to improve your painting skills


Painting is a key part of our hobby, after all, it is the look of the models and armies what got us here in the first place. It doesn't matter if you are a beginner or have been here for a while, if you like or despise painting, these simple tips will help you get consistently better results.

Where do these come from? well with work, house moving, a pneumonia and a small kid at home, my gaming time suffered a drastic reduction (read: was terminated) and I was limited to painting and collecting. I found this can also be a social activity, with plenty of forums and groups you can share your progress with, and events that can drive your motivation to learn, like painting courses or competitions. This is the summary of the most important things I've learned in the last 6 months and that I feel have really made me progress:


1-Use a wet palette
If there was a secret tool ever to improve painting, that has to be wet palettes. Essentially it keeps your paint humid and makes blending a lot more easier. You can add some paints and mix them as you want - the more mixes, the smoother transitions will be. Even if you don't want to spend too much time in a given miniature, making a small color graduation is going to make that coat or fatigues look so much better. The improvement will be much more noticeable if you are still painting straight from the paint pot, as the wet palette will naturally water down your paints.

The wet palette is going to make the paint last much longer before drying, and by that I mean you can add some colours there and keep using them for some days. As long as there is water below, the paints won't dry.

The other great thing about wet palettes is how simple and cheap they are - all you need is an adequate surface, like an old dish or box cover, a sponge and baking paper. Check an online tutorial, like this one from Massive Voodoo.


2-Get a high quality brush
As most people out there, I've been using Citadel brushes for years and always been happy with them; they aren't that expensive, can last a while and generally get the work done. Nothing wrong with that eh? Well, I recently attended a painting course with master painter Volomir and if there was one thing he stressed all day long, was that it was imperative to use quality brushes! the best out there are the infamous Winsor and Newton series 7. Granted one of those costs like 3 Citadels but they are well worth the price. These brushes are very good at keeping a sharp edge and are extremely helpful for blending colors. I was hesitant at the beginning but after trying them, I know I'm not using anything else.


3-Study some color theory
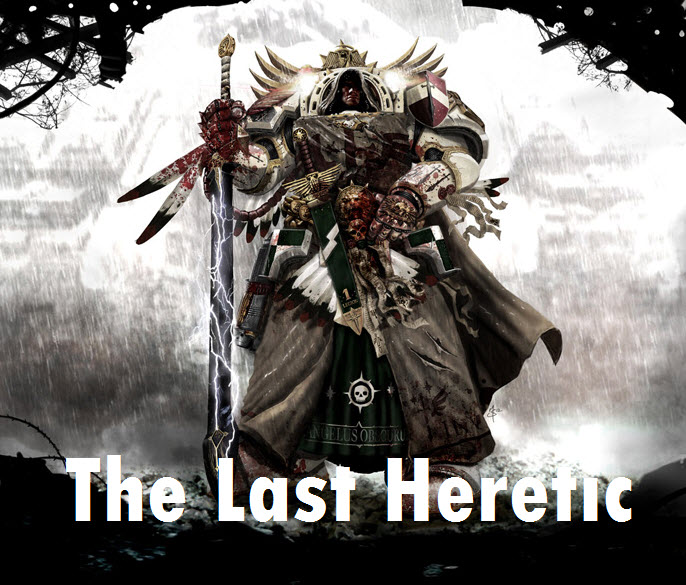
Color theory is again something that most of us have a sense for but probably have never gotten too much thought about why some colors look good together (turquoise + orange on the example below ) or why that army is so catchy on the eye. At the end of the day, when we are painting miniatures what we are actually doing is trying to make a small scale look like it was much bigger, and because the light and color properties are much different in a 1/1 or 1/50 scales, we do things like edge highlightning or shadows. And the secret to great looking miniatures is creating contrast. Contrast can simply be shadow vs. light. lack and white, but can also be done in subtler ways like using complementary colors (wonder why Orks have red accents?), warm/cool and more. So my advice is read something on the subject and start playing with color combinations based in the theory: for example, use a complementary color for the shadows instead of a black (or even better, mix black with that complementary and a bit of the base color); choose color accents keeping in mind their relation with other colors (see the army above, the blue accent contrasts with the orange weathering), etc.


4-Attend painting competitions and courses
This mini really caught my eye on the Games Day 2012
Painting competitions can be a double edge sword - comparing your stuff to incredible pieces of art produced by professionals who have invested 150 hours in that piece alone can be hard, but also a great motivation. I think having the chance to see all that inspiration more than compensates the possible deception, and can be a powerful motivator in the future. Sure you don't need to paint all that well, all that you need is catch some ideas or concepts and try to apply them on your own. For example, I was blown away by the 'Eavy metal painted Sanguinor I saw on the Games Day 2012 but that is something I will not even attempt at the moment; instead I realized most faces were painted in a different way than the usual White Dwarf tutorial of base flesh color + brown wash, and have been making progress since in replicating those. Now I'm quite happy with the way I paint faces and while they will not win me a prize, I can look at those in my cabinet with some pride. So be prepared to be blown away and be positive - use it as inspiration not to demotivate you!

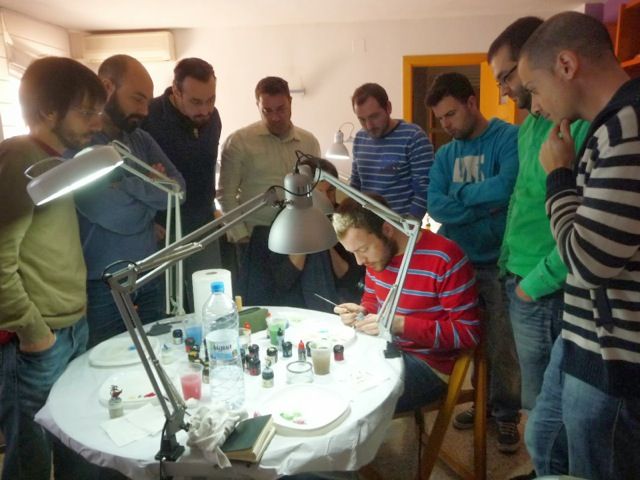
I was there... the day after this session
As for the courses, having someone show you how blendings and glazes are done will save you countless hours of trying on your own. My own experience was not so much of being a better painter after the course, but of having the tools now to become one. Sure my first attemps at blending like I was taught weren't great but even the first attemps already were better than anything I'd done before. Now I know it's down to me putting enough hours to get there. And let's not forget on the social side of things, it is a great way to get to know other people with similar interests and have a great time painting together. This can help you find a painting group, who said painting was not a social activity?

Hope this was useful, it really reflects my thoughts after doing those points myself, and I think this is the biggest leap I have ever made in painting. Have you had similar experiences or other tips to share?

Tuesday, June 17, 2014

Rocco the massive Orc finally arrived

Nearly after 7 months after Rocco's Indiegogo campaign finished, I have finally received my copy of Rocco, a giant bad-ass Orc boss and his monster ride. I have seen plenty of unboxings and comments about this campaign and many were negative, so I wanted to chime in and show you what it is so you can form your own opinon.

First things first, the sculpt by the talented Allan Carrasco is nothing short of amazing, with a very detailed Rocco head and body. The star of the show however is the beast itself, with a level of detail I had not seen before. Just look at those claws or face, make the Fantasy plastic dragons cry (and let me clarify I love those, I own a metal Wood Elf Dragon, a plastic Mercenary Elves and a plastic High Elves so I know them well).

One of the perks of the campaign was the banner, which is a nice boon and bane all in one. At least it is a boon for those of us not very gifted at freehand but hey, I'm sure we can all produce something half decent if we put enough thought to it. This painted example by JBT himself is a good example; the banner looks good but it is simple enough than most of us can do something similar. Allright enough digression, let's get to the unboxing:

This is what you got with the campaign: Rocco + monster ride, a banner for Rocco and 3 additional miniatures: Tahar Ama the barbarian, Carmina an Elf-woman with a banner, and Helmut that is a nice little cyber punk miniature. In addition comes printed version of the artwork , which unfortunately is not signed by the authors as promised. The paper is also bent due to the packaging but this is not something that matters a lot to me...


This is Rocco with shield, lance and horns. The bits at the top right are the 2 halves of the rock in which the beast is sitting on, and below the 2 main parts of the monster's body. There are no mold lines at all, and the level of crispness of the details are superlative. Absolutely top-notch.


These are the beasts' head, arms, legs, horns and mount. Again compare to your standard plastic dragon, which is not much more expensive by the way.

This is the banner perk, a nice detailed banner with some hanging skulls as decoration! you could really use this one in a Fantasy army.


And now onto the extra miniatures! Helmut here is a little man/robot, reminds me of some robots you encounter in Final Fantasy XIII. It could be used as a Mechanicum conversion too.
Carmina wears an armor alike to Elrond's Elves host at the very begginning of in the Lord of the Rings, and has another banner.

And finally Tahar Ama, a barbarian girl with an axe. All the 3 perks are nice miniatures and whilst I wouldn't have bought those on their own, I'm happy to have them around.


All in all this campaign has taken 7 months to deliver the stuff, which is unusual for crowdfunding campaings. 75€ for all of this including shipping is I think a more than fair price, especially considering how great the main sculpt is. Whether you want something different to paint, or are looking for alternate Fantasy models, these will not let you down. Look forward to see my progress in some weeks time... thanks for reading!
-Albert

Friday, June 13, 2014

Eldar Fire Prism showcase

Greetings! After sitting for a while packed in a box (I moved home) I finally managed to complete this Ulthwé Fire Prism. Oh boy this is a beautiful kit! It has all the elegant, alien lines of the Eldar and adds an incredible turret. If that isn't a big gun, I don't know what it is! Of course game-wise Prisms are still a good option; with 3 fire modes and a 60" range there is always something the Prism can deal with. 

The turret and weapon options are fully magnetised so I can convert it to a Night Spinner or a Wave Serpent with the help of a FW turret. Unfortunately, the Night Spinner parts are still lost in some of the (many) boxes that had to be unpacked yet. Oh well.


I'm pretty pleased with the color scheme, the lightning blue parts mesh well with the Eldar aesthetic and give a pulsing sense of energy. You might notice the gems are not yet painted - I will just batch-paint them all in the future, when that dreaded day comes. For now I just basecoated where I wanted the gems to be.


The back of the Prism replaces the normal Serpent door for what seem batteries or generators, and fit very well with the overall energy theme.

The gunner cockpit - all the pilots in my Eldar army are painted in this blue/greenish scheme, like they're lit by displays.

The bottom of the turret has more lightning, and you can see in the main body the different sources. I wanted it to be throbbing with energy, but not so much to make it look blue. I think I got a good balance here with the gunship still being black for the most part.

The turret without the guns - you can see where the magnets are, with the paint scrapping due to the usage. Magnetizing this kit is not only good in terms of game options, but it is a must if you plan to move it around and keep it in one piece.

It only has one Ulthwé mark on this side of the hull; I might add a Prism symbol on the other side, and that's about it. This model is so elegant that doesn't deserve to be covered in decals!

And this is where the magnets are placed. The GW designers didn't make it as easy as it could have been, but it is doable nonetheless and very recommendable. Just keep in min the Prism itself is rather long and you will need a larger magnet for this one; I think this one has a 8mm diameter.

And that's it. Hope you liked it!
Related Posts Plugin for WordPress, Blogger...